.jpg)
Electroplating is a powerful post-processing technique that can transform 3D printed objects. By coating a plastic part with a layer of metal, you can give it a high-quality finish, improve its durability, and even add electrical conductivity. This process opens up new possibilities for 3D printing, moving it beyond simple prototyping to creating functional, end-use parts.
The process of electroplating essentially involves using an electric current to reduce dissolved metal cations and form a thin, coherent metal coating on a conductive object. While the principle is straightforward, applying it to 3D printed parts requires specialized techniques to ensure a flawless finish and strong adhesion.
Why Electroplate? The Advantages
The primary reason to electroplate a 3D printed part is to enhance its properties. A thin layer of metal, such as **copper, nickel, or chrome**, can significantly increase the part's strength and wear resistance. This is especially useful for parts that will be subjected to mechanical stress or friction, which is a common requirement in R&D projects. Furthermore, the metallic finish provides an aesthetic appeal that can mimic traditional manufacturing methods, giving a plastic part the look and feel of solid metal. For hobbyists and engineers, this means creating parts for cosplay, robotics, or custom electronics that are both beautiful and robust.
The Electroplating Process
Electroplating a 3D printed part is not a one-step process. It requires careful preparation to ensure a successful, lasting bond between the plastic and the metal. The process typically involves these key stages:
- Preparation and Post-Processing: The first step is to clean the 3D printed part thoroughly. Any residual support material, layer lines, or surface imperfections must be sanded and smoothed. This is crucial because the electroplating process will amplify any flaws on the surface. For FDM parts, this may involve vapor smoothing with solvents like acetone to reduce visible layer lines.
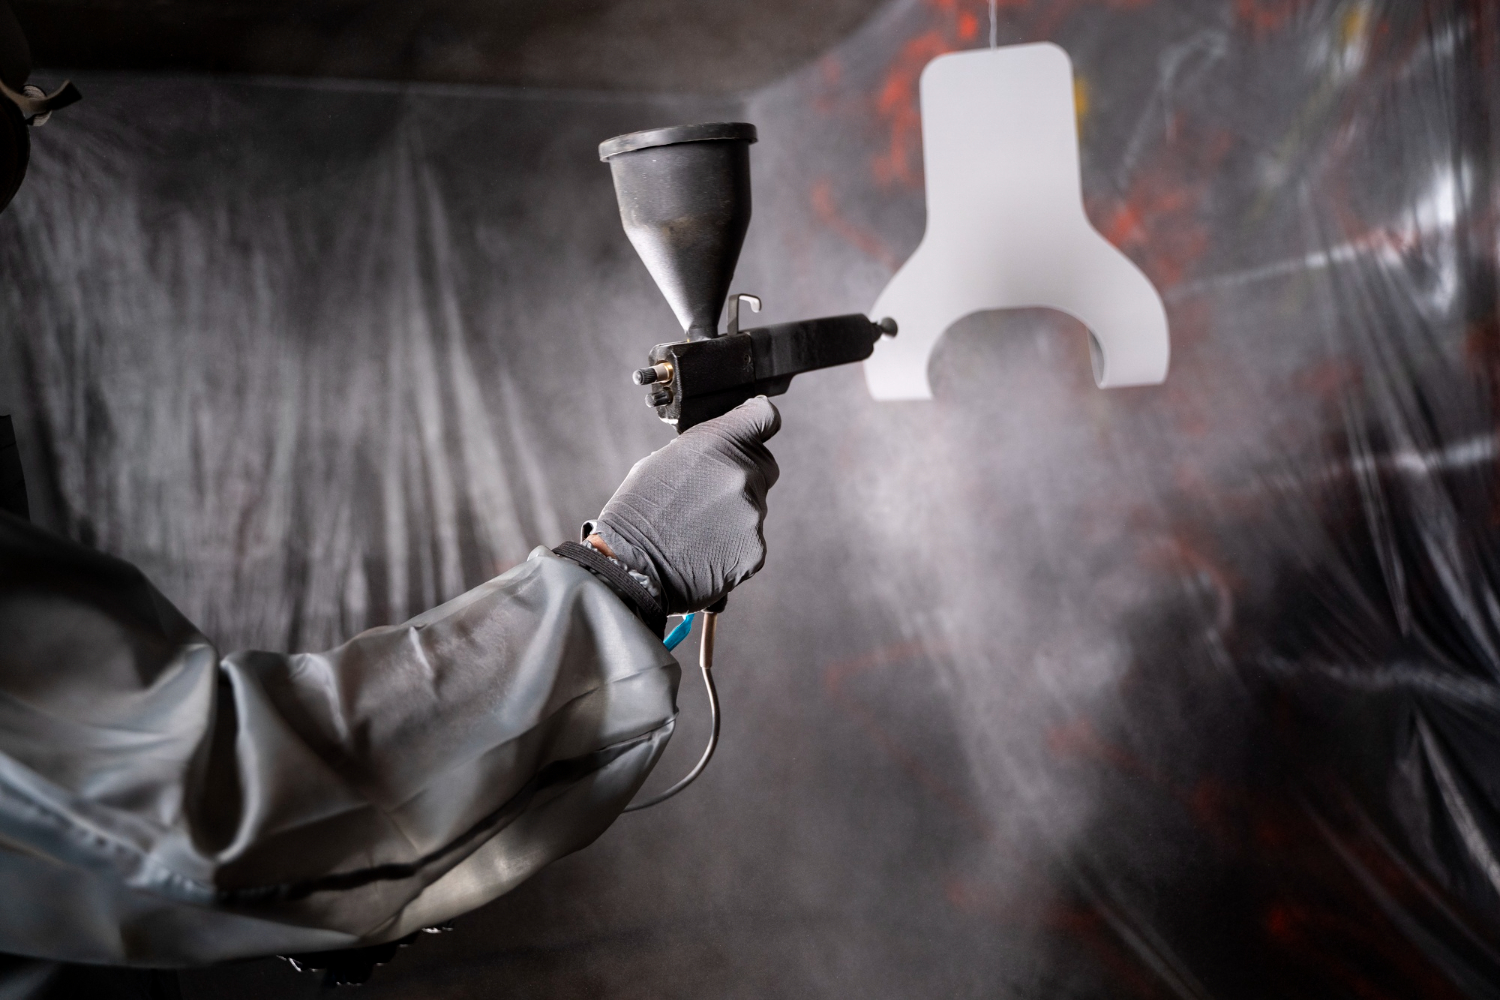
- Making the Part Conductive: Since plastics are not electrically conductive, the part must be coated with a conductive paint or spray. This layer provides the necessary surface for the metal ions to adhere to during the electroplating bath. This step is arguably the most critical, as an uneven or incomplete conductive layer will result in a flawed or patchy finish.
- The Electroplating Bath: The prepared part is then submerged in an electrolytic solution containing metal ions. An electrical current is passed through the solution, causing the metal ions to deposit onto the conductive surface of the 3D printed part. The thickness and quality of the plating are controlled by factors like current density, temperature, and the duration of the bath.
- Final Polish: After the part is removed from the bath, it may undergo a final polishing step to achieve a desired luster or finish.
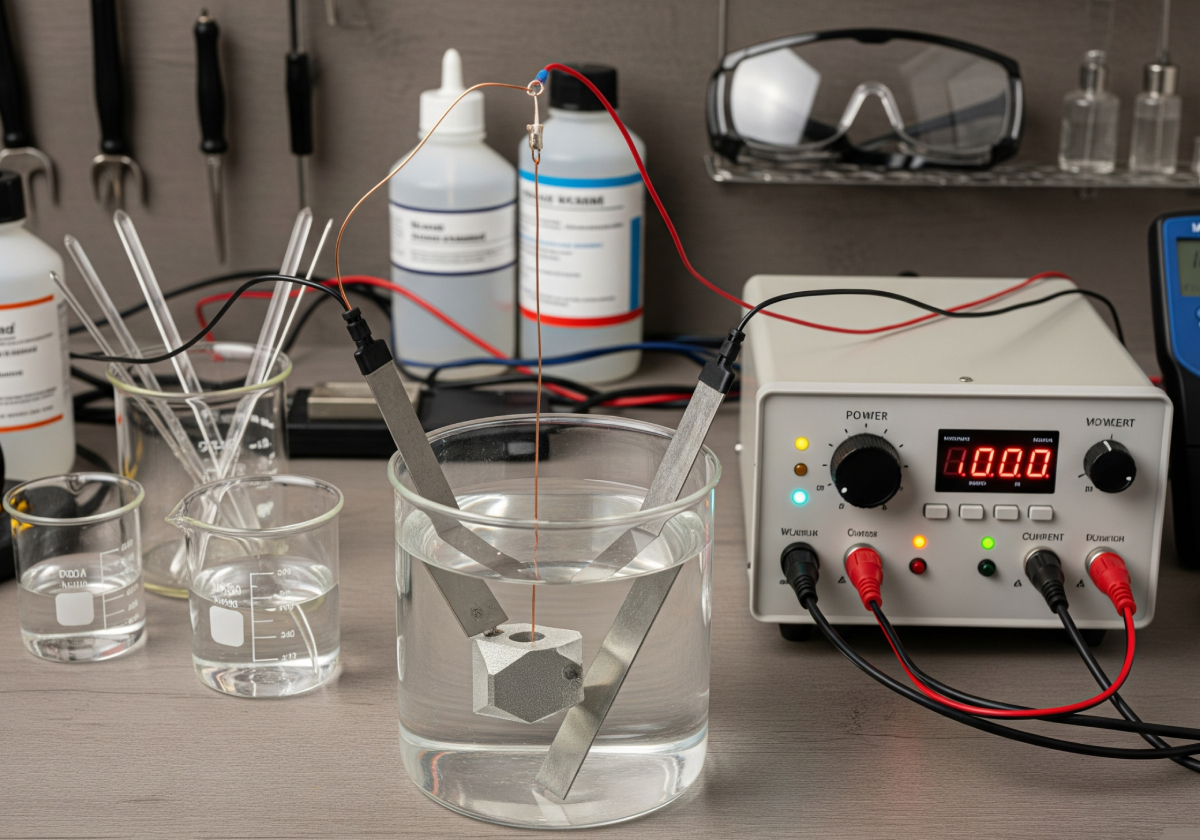
The chemical and electrical properties of the bath solution are carefully calibrated for the specific type of metal being deposited. Copper is often used as a base layer due to its excellent conductivity and adhesion, followed by a more durable metal like nickel or a decorative one like chrome. This multi-layer approach ensures both functionality and aesthetics.
This technique is particularly valuable for projects requiring high-volume batch production of durable parts. By combining the design freedom of 3D printing with the material properties of metals, electroplating allows for the creation of components that are both lightweight and strong, bridging the gap between additive manufacturing and traditional metalworking processes.